


Easy HVAC Maintenance Tips for Homeowners: A Simple Checklist to Save Money and Stay Comfortable
Regular HVAC maintenance is a few simple checks and seasonal tune-ups that keep your heating and cooling running efficiently, lower monthly bills, and cut the chance of surprise breakdowns. In this guide we walk Cleveland, TN homeowners through practical tasks: how often to change filters, safe DIY cleaning for outdoor AC units and condensate drains, basic furnace tune-up steps, and how to ready systems for our local humidity and temperature swings. Neglected systems mean higher energy costs and less comfort; focused maintenance — on airflow, filtration, and basic mechanical care — brings performance back. You’ll find step‑by‑step DIY instructions, tool lists, safety checkpoints, signs that mean it’s time to call a pro, and clear time estimates so you can plan the work. We’ll also cover the measurable benefits for energy savings and equipment life while using helpful keywords like furnace maintenance, AC maintenance, air filter replacement, condensate drain line cleaning, and indoor air quality so you can take practical action today.
What Are the Essential HVAC Maintenance Tasks Every Homeowner Should Know?
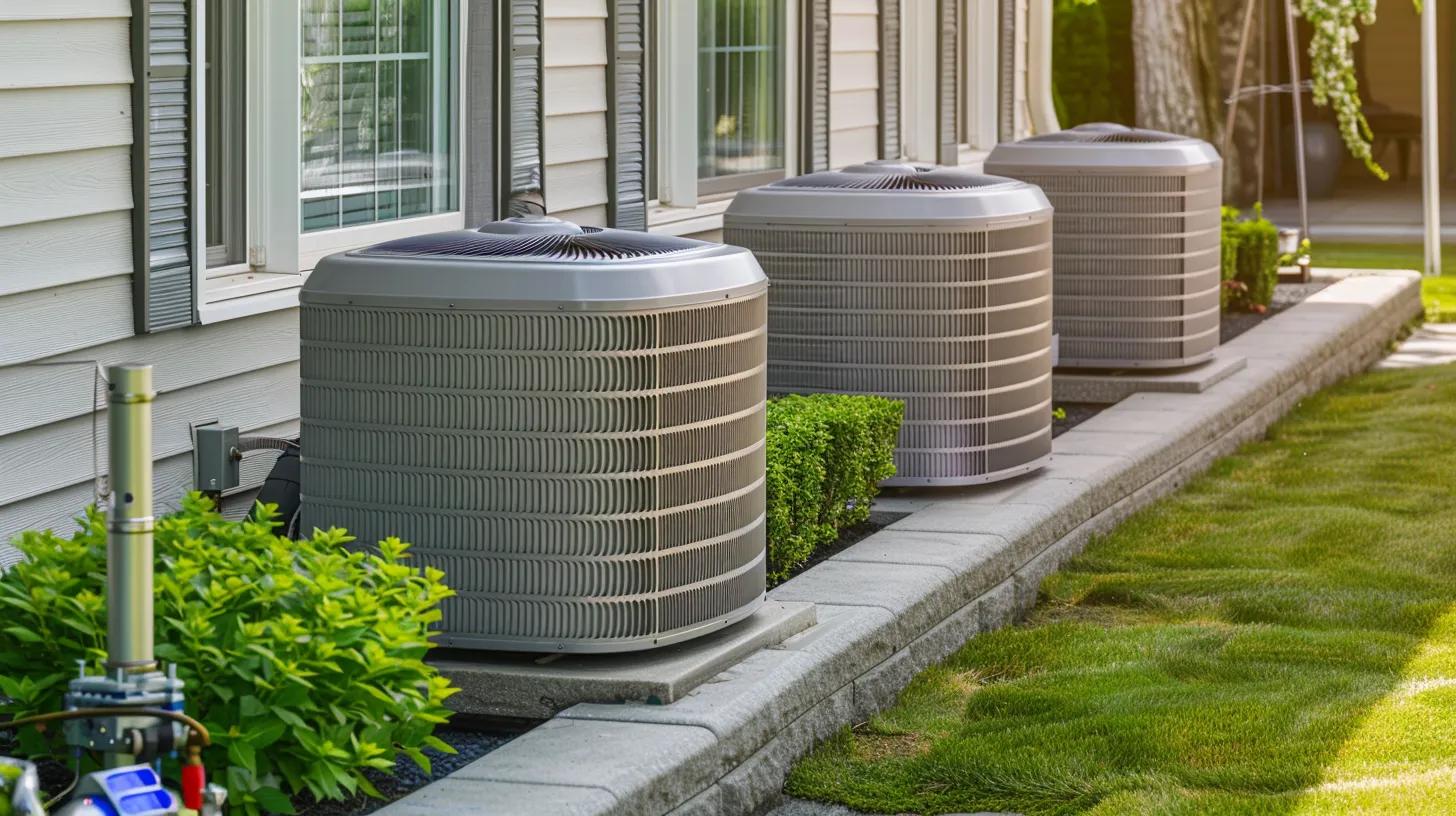
Essential HVAC maintenance tasks are simple, regular actions that preserve airflow, efficiency, and safety by focusing on the system’s main parts: filters, the thermostat, vents, outdoor equipment, and condensate drains. Doing these tasks prevents unnecessary strain on compressors and furnaces, lowers energy use, and reduces wear on motors and bearings. Pay attention to airflow (clean filters and open registers), clean coils, and clear drains for quick comfort improvements and real efficiency gains. Below are the highest-impact items most homeowners can handle on a monthly to seasonal rhythm, with quick frequency tips to keep systems healthy between professional tune-ups and to help spot issues early.
The most critical tasks include:
- Check and replace air filters on a schedule to maintain airflow and filtration.
- Verify thermostat programming and fresh batteries so the system doesn’t run when it shouldn’t.
- Inspect vents and registers for blockages and make sure airflow is balanced across rooms.
- Look over outdoor condenser units and clear debris—leave at least two feet of space around the unit.
- Flush or inspect condensate drain lines to avoid water damage and microbial growth.
These quick actions ease immediate comfort issues and make seasonal service more effective. The next section explains ideal filter replacement intervals and what changes them.
How Often Should You Replace Your Air Filter for Optimal HVAC Performance?
Replacing the air filter is the most effective maintenance task a homeowner can do: a fresh filter restores airflow, lessens fan strain, and improves indoor air quality by trapping dust and allergens. As a rule of thumb, check common disposable filters every 1–3 months — closer to one month if you have pets, smokers, or allergy sufferers. Higher-MERV filters capture finer particles but may limit airflow if your system isn’t designed for them, so balance filtration and airflow and consult your system specs before moving above MERV 8. A clogged filter makes units run longer and use more energy, which speeds component wear and shortens system life, so keeping to a schedule saves money and trouble.
Household factors change the interval: busy homes, heavy pollen seasons, or renovation dust require more frequent checks. The next subsection covers simple AC-focused DIY tasks that pair well with regular filter changes.
What Are Simple DIY AC Maintenance Tips to Keep Your System Running Smoothly?
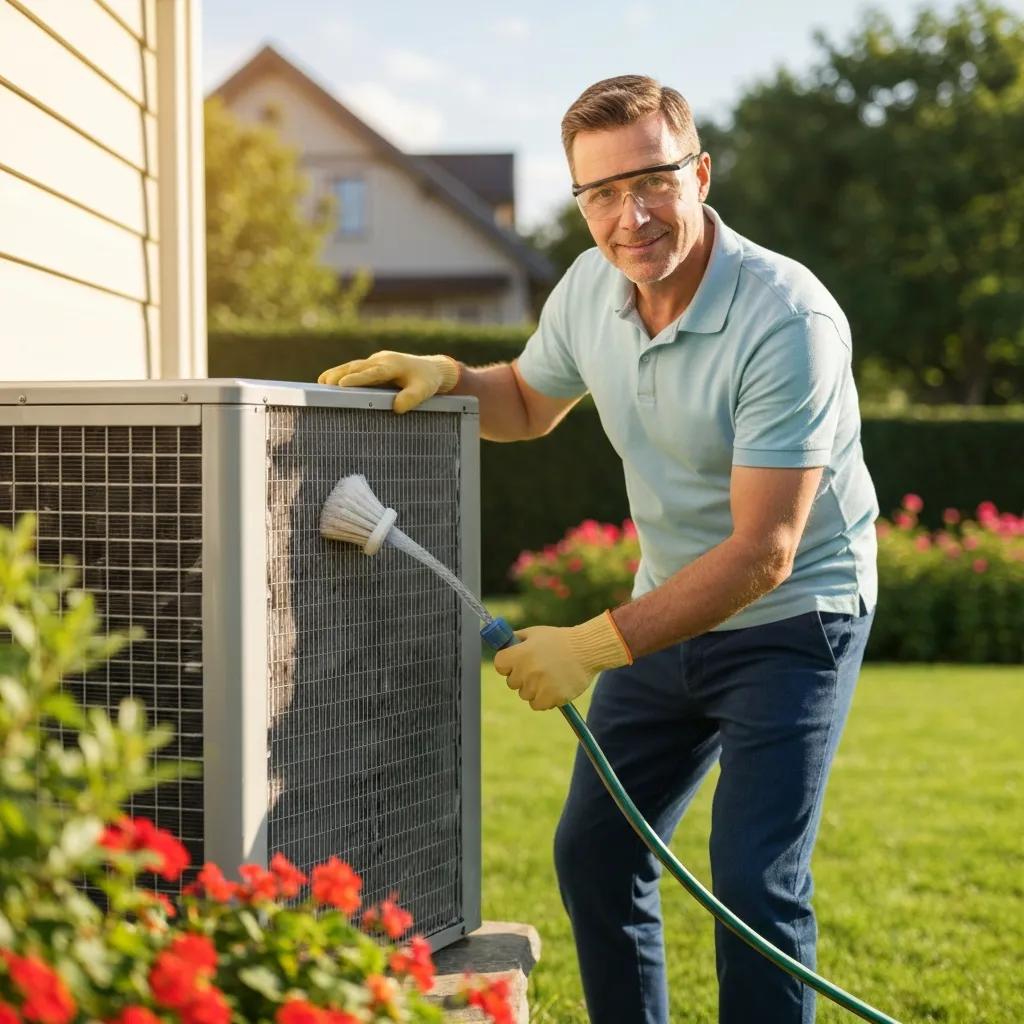
Simple DIY AC maintenance preserves cooling capacity and helps avoid mid‑summer failures by sticking to low‑risk tasks homeowners can safely do. Start by turning off power at the disconnect, then remove leaves, sticks, and tall grass from around the outdoor condenser. Gently brush fins and give the unit a careful hose rinse to remove surface dirt without bending fins. Inside, change the filter, confirm thermostat setpoints and schedules, and make sure supply vents are open and clear so airflow stays balanced. Never attempt refrigerant repairs or electrical work; if you see leaks, ice on coils, or major performance loss, stop and call a technician.
These DIY steps usually take 15–60 minutes depending on home size and get your system ready for a seasonal professional tune-up, which we cover later.
How Can Homeowners Perform a DIY HVAC Maintenance Checklist Safely and Effectively?
A safe, useful DIY HVAC checklist starts with powering the system off, having the right tools, and planning time so you don’t rush and risk injury or damage. Always shut off breakers or use the system disconnect, wear gloves and eye protection, and never probe live electrical terminals. Gather supplies and follow an ordered checklist so tasks flow from easy to more careful steps — that lowers the chance of missed items and gives consistent results. Below is a compact tools-and-supplies reference to help you gather what you need before you begin.
Note: these are common, affordable tools most homeowners can buy or borrow to finish basic tasks in one session.
| Tool or Supply | Use | Estimated Time to Acquire |
|---|---|---|
| Disposable pleated filters (1–3 months) | Replace airflow‑restricting filters | Same‑day at hardware stores |
| Screwdrivers and nut drivers | Open access panels, tighten loose fasteners | Same‑day |
| Soft brush and garden hose | Clean outdoor condenser fins and coil exterior | Same‑day |
| Wet/dry vacuum or small plumber’s snake | Clear condensate drain clogs | Same‑day to 1–2 days |
| Coil‑cleaning spray (no‑rinse foaming) | Remove grime from indoor coils | Same‑day |
Getting supplies before you start cuts down on interruptions. The next paragraph gives step‑by‑step cleaning instructions for outdoor units and condensate drains.
What Tools and Supplies Do You Need for Basic HVAC Maintenance?
Having the right tools makes maintenance faster and safer while reducing unnecessary service calls. Essentials include screwdrivers for access, correctly sized replacement filters, a soft brush and hose for gentle coil rinsing, a small vacuum or plumber’s snake for condensate lines, and basic safety gear like gloves and eye protection. Compressed air or a shop‑vac can help in some tasks when used carefully — avoid high pressure or harsh chemicals that can damage coils or fins. Building a small reusable kit is a modest investment that pays off in fewer service visits and better indoor air quality.
With tools on hand you’ll move through the checklist more efficiently and avoid stopping mid‑job to fetch supplies.
How to Clean Outdoor AC Units and Clear Condensate Drain Lines Step-by-Step?
Cleaning the outdoor AC unit and clearing condensate drains are high‑value DIY jobs that require steady, safe steps to avoid damage. First, shut power at the disconnect. Remove loose debris by hand or with a soft brush, carefully straighten any bent fins, then rinse the coil with low water pressure from the inside out to avoid pushing dirt deeper. For condensate drains, find the access point near the indoor evaporator, clear visible debris, and flush the line with a cup of white vinegar followed by water; stubborn clogs may need a small plumber’s snake. Watch for refrigerant leaks, strange noises, or standing water — those are stop‑and‑call‑a‑pro checkpoints.
Finishing these steps restores proper drainage and heat exchange. If you want professional confirmation after DIY work, Springdale Heating & Air can verify results; homeowners can Schedule Your HVAC Tune‑Up to confirm system health.
Use this short checklist before deciding whether to call a pro:
- Turn power off at the breaker or disconnect before any cleaning.
- Remove visible debris and rinse the outdoor coil gently.
- Replace the air filter and check airflow at vents.
- Flush the condensate drain with vinegar, then test that it drains properly.
| Entity | Tool/Supply | Estimated Time |
|---|---|---|
| Filter change | Replacement pleated filter | 10–15 minutes |
| Outdoor coil cleaning | Soft brush + hose | 20–45 minutes |
| Condensate drain clearing | Vinegar + small snake or wet‑vac | 15–30 minutes |
| Thermostat check | Fresh batteries + programming review | 5–15 minutes |
These quick time estimates help you plan a morning or afternoon for a thorough basic maintenance session.
Why Is Regular Furnace Tune-Up Important and How Can You Do It Yourself?
Regular furnace tune‑ups keep heating systems safe and efficient by addressing combustion, airflow, and mechanical wear that drive up bills and create hazards. For gas furnaces, professional tune‑ups include inspecting burners, the heat exchanger, ignition components, and venting to reduce carbon monoxide risks and ensure proper combustion. Homeowners can do non‑invasive checks — change filters, test the thermostat, and visually inspect vents — but combustion testing, gas adjustments, and sealed‑system diagnostics must stay with certified technicians. Routine care reduces winter failures and extends furnace life. The checklist below clarifies what you can do yourself and what requires a pro.
What Are the Key Steps in a Furnace Maintenance Routine?
Homeowner steps include replacing filters, cleaning and inspecting vents and returns, testing the thermostat and batteries, and checking the furnace area for dust or obstructions. Make sure flue pipes and outside vents are clear of debris and that the blower area is free of buildup so airflow isn’t blocked. Don’t open sealed combustion chambers or tamper with burners or gas lines — those tasks require a licensed technician for safety and code compliance. After your homeowner checks, schedule a professional inspection to handle combustion and efficiency adjustments that extend equipment life.
| Component | Maintenance Step | Expected Outcome |
|---|---|---|
| Air filter | Replace every 1–3 months | Restored airflow and lower fan workload |
| Blower assembly | Visual clean and secure fasteners | Reduced vibration and improved heat transfer |
| Vents and flue | Inspect and clear obstructions | Safer combustion and proper exhaust |
| Thermostat | Test and reprogram schedules | Optimized runtime and comfort |
This table ties common furnace tasks to clear outcomes so you can prioritize work and know your DIY limits.
When Should You Schedule a Professional Furnace Inspection?
Schedule a professional furnace inspection once a year, ideally in early fall, to confirm combustion safety, check efficiency, and catch hidden problems before heavy use. Call a technician immediately for warning signs like odd odors (especially gas or burning), yellow or flickering pilot flames on gas units, frequent short‑cycling, unexplained increases in heating bills, or carbon monoxide detector activation. Technicians do combustion analysis, tighten electrical connections, and inspect gas pressure and heat exchanger integrity — work beyond homeowner checks. Booking a pro before the heating season reduces emergency repairs and gives you confidence in safe operation.
Spotting warning signs early naturally leads into how maintenance pays off in energy savings and longer equipment life, covered next.
What Are the Benefits of HVAC Maintenance for Energy Savings and System Longevity?
Regular HVAC maintenance produces measurable energy savings, extends equipment life, and improves indoor air quality by keeping components clean and calibrated so systems run closer to design efficiency. Conservative estimates show routine maintenance can cut energy use roughly 5–15%, depending on system condition and local climate. Those savings come from better airflow, less compressor runtime, and properly tuned combustion on furnaces. Maintenance also prevents big failures by letting you replace worn parts early and avoiding damage caused by chronic strain — effectively adding years to a system’s life. Cleaner filters and coils reduce indoor particulates, improving comfort and lowering allergy triggers.
| Component | Maintenance Action | Energy/Longevity Impact |
|---|---|---|
| Air filter | Regular replacement | Improves airflow; cuts fan runtime by up to 10% |
| Condenser coil | Cleaning debris and dirt | Restores cooling capacity and reduces compressor load |
| Thermostat | Proper programming and calibration | Reduces unnecessary cycles and peak demand |
| Ductwork | Sealing and basic inspection | Reduces distribution losses and balances rooms |
This comparison shows how modest maintenance investments translate into lower bills and longer equipment life. Next we look at indoor air quality and local savings examples.
How Does Regular Maintenance Improve Indoor Air Quality and Comfort?
Regular maintenance improves indoor air quality (IAQ) by keeping filters and ducts effective at capturing particulates, keeping coils dry to reduce microbial growth, and helping humidity control work as designed to lower mold risk. Clean filters trap dust, pet dander, and pollen before they circulate, while clear condensate drains and dry coils reduce microbial colonies that cause odors and irritation. If IAQ is a priority, consider higher‑efficiency filters (checking system compatibility), standalone HEPA purifiers, or UV‑C options for coil sanitation as complements to routine HVAC care. Better IAQ leads to fewer allergy symptoms, more even temperatures, and less lingering odor.
How Much Can You Save on Energy Bills with Proper HVAC Care?
Conservative estimates put energy savings from proper HVAC care at about 5–15%, with actual savings depending on home size, insulation, local climate, and system age. In the Cleveland, TN area, where cooling demand and humidity are significant, you’ll see the biggest gains when maintenance corrects severe airflow restrictions or when filters and coils are heavily fouled. Savings come from fewer compressor cycles, shorter fan run times, and better heat exchange — all of which shave runtime by measurable hours each season. Think of maintenance as steady ROI: annual tune‑ups and consistent filter discipline avoid big failures and compound savings over time.
Frequently Asked Questions
What are the signs that indicate my HVAC system needs professional attention?
Watch for persistent unusual noises like clanking or grinding, strange odors such as burning or gas, rapid cycling, and failure to reach set temperatures. Visible refrigerant leaks or ice on coils are serious signs too. If you notice any of these, shut the system down if needed and contact a qualified technician to protect your home and family.
How can I improve indoor air quality through HVAC maintenance?
Improve indoor air quality by keeping filters clean and replacing them regularly so dust and allergens don’t circulate. Keep condensate drains clear to prevent moisture buildup and mold. Consider higher‑efficiency filters (if your system supports them) or add HEPA purifiers for extra filtration. Routine HVAC maintenance reduces allergens and helps create a healthier home.
What should I do if my HVAC system is not cooling effectively?
Start by checking the air filter — a clogged filter often limits cooling. Confirm the thermostat is set correctly and working. Clear debris from the outdoor unit and make sure it has proper clearance. If those steps don’t help, you could be looking at a refrigerant issue or failing component that needs professional diagnosis. Avoid attempting refrigerant work yourself — that requires licensed technicians and special tools.
How often should I schedule professional HVAC inspections?
Schedule professional HVAC inspections at least once a year, ideally before the heating or cooling season. A furnace check in early fall and an AC tune‑up in spring are good habits. Regular inspections catch small problems early, keep equipment efficient, and can extend system life — which saves money over time.
What are the benefits of seasonal HVAC maintenance?
Seasonal maintenance improves energy efficiency, increases comfort, and extends equipment lifespan. Regular checks help systems run at peak performance, reduce energy use, and cut the risk of unexpected breakdowns during extreme weather. Small repairs found early are cheaper than emergency replacements, and seasonal care delivers peace of mind all year.
Conclusion
Routine HVAC maintenance boosts system efficiency, lowers energy costs, and helps equipment last longer. By following simple DIY tips and scheduling annual professional inspections, homeowners can keep indoor air quality high and comfort steady year‑round. Don’t wait for a breakdown — take proactive steps now to protect your system. Visit Springdale Heating & Air to learn about our services and keep your home comfortable and energy‑efficient.